Access Denied
IMPORTANT! If you’re a store owner, please make sure you have Customer accounts enabled in your Store Admin, as you have customer based locks set up with EasyLockdown app. Enable Customer Accounts


1
/
of
5
Replacement LCD C screen for DNA Devices
Replacement LCD C screen for DNA Devices
Regular price
$ 15.00
Regular price
Sale price
$ 15.00
Unit price
/
per
Shipping calculated at checkout.
Couldn't load pickup availability
Bad Screen? Cracked, Damaged, White? This is the replacement screen to get your device back in proper working order!
Replacement is easy, universal video tutorials can be found on YouTube but we are working on a walk through for anyone uncomfortable with doing this. (you can also return your device to our shop and we will swap the screen, just pay shipping... and the screen of course)
Includes original DNA LCD Screen with mounting tape pre-applied and and ready to install, if applicable.
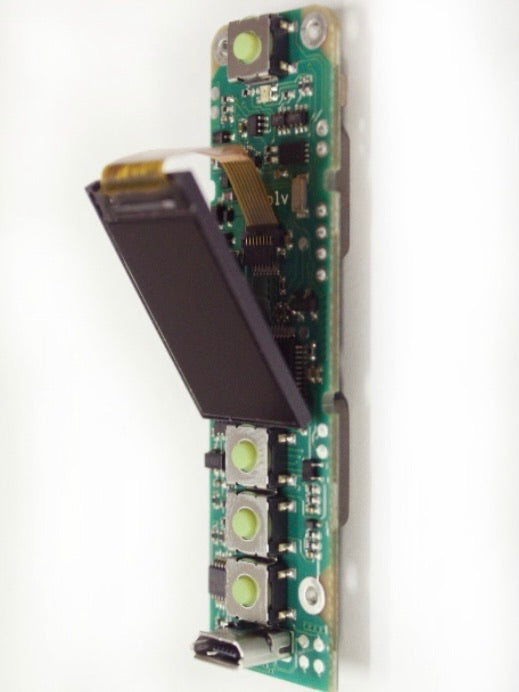
For BMM 75c/250c Devices: The screen is taped to a cradle. This cradle is press fitted inside the board opening and can move up and down slightly to adjust screen alignment with the view opening.
For BMM 60C Devices:
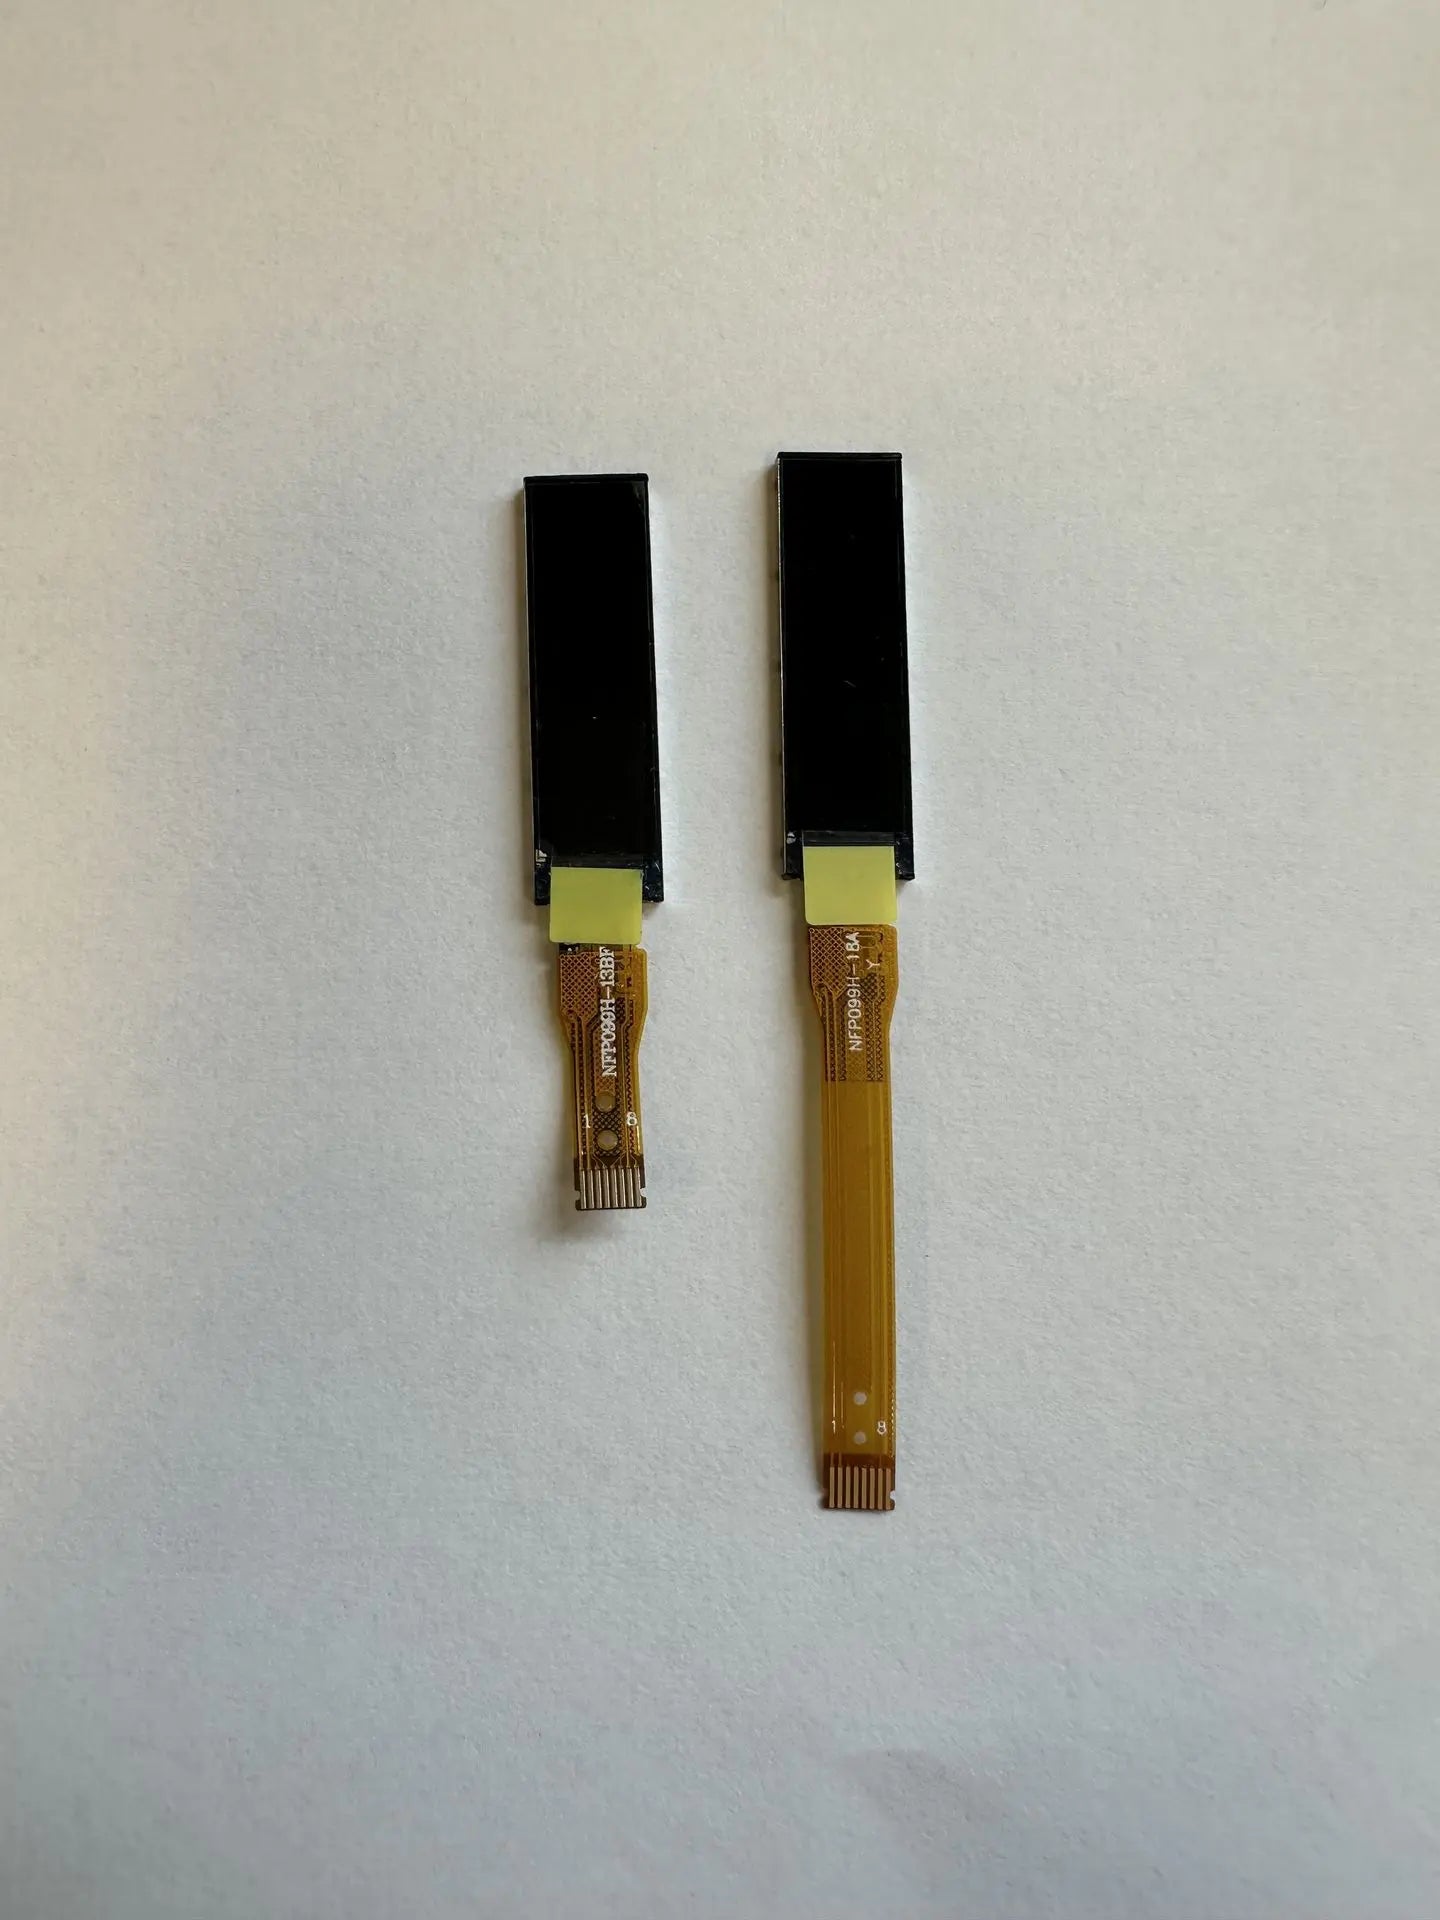
38 Special - This device uses a 40mm Ribbon Screen and is inserted into a pocket at the bottom of the device, simply disconnect the screen from the ZIF Socket and slide out the bad screen, insert the new one and reconnect the ZIF cable, Gently tuck the ribbon behind the board (DO NOT KINK THE RIBBON) and reinstall.
Gambler, BootLegger and Twenty2 - These devices use a 20mm Ribbon Screen and is Lightly Glued into its opening to prevent movement using e6000 or B7000 contact glue. The screen is installed with the ribbon folded gently up between the buttons (Pay attention to orientation during removal) KINKING THE RIBBON IN THE WRONG PLACE WILL RENDER THE SCREEN INOPERABLE AND CAUSE PERMANENT DAMAGE.
Using a small tool, simply pry the screen and cradle assembly up gently from the bottom. You will find the flex cable attached to a ZIF connector on the board. This connector has a latch that opens upward to release the cable. One unlatched the cable is easily removed upwards, towards the power button.
Peel the old bad screen off of the cradle assembly, remove the backing from the tape on the new screen and attach it to the cradle. Then reinsert the tip connector and push the latch back into place to lock the connection
NOTE**. We have had several customers return devices for white NEW screen and have almost always found 2 things. 1, the connector is not fully seated or is installed BEHIND the ZIF connector and not in it. Or 2 the cable is pinched/kinked.
Once the connector is properly installed gently pull the screen down toward the menu buttons and using your finger or another small tool hold the ribbon down gently and fold the ribbon under the screen/cradle assembly and reinstall the assembly. The cradle should sit ontop or or just above the + menu button housing.
Reinstall your battery and test. The ribbon cable is extremely delicate and does not live very long to repeated adjustment or rough handling.
Additional Note *** We have had several customers purchase replacement screens only to later find that the C board was actually in stealth mode (black screen) and not actually a bad screen at all. Test this by pressing any of the menu buttons after power is turned on.
Lastly, we do not warranty screens. Due to their delicate nature and various handling issues these are not a warrantable item. Very very rarely have we ever even seen a bad screen from the factory but any desired warranty claims must be made directly through evolv assuming they will warranty them at all.
Share


Invalid password
Enter